
Now, onto my post.
The members of Hive #2 of Newbee Quilters were asked to make a Maple Leaf block for January. Most tutorials for this pattern are for a 6" block. The few 12" block tutorials I found were either fiddly with too little (or none at all) wiggle room or weren't very detailed....both things most new quilters need. So...I decided to take photos while making a test block myself and post a tute for anyone that still needs it. The photos are poor as it was very late and lighting is horrible in this house. But they should be enough to help!
I do make this block slightly different than most other tutorials I've seen. I'm a bit...neurotic... about some things when I sew, which is the reason I do it differently. lol I like to make as many HST's at once as possible, and I prefer to make my HST's a bit large so that I can square up/trim them to the exact size after sewing...I include this little leeway and trimming space in my measurements below. Always sew with a scant 1/4" seam. There is as I said a little wiggle room here for some pieces, but accurate seam allowances are very important! SO.....practice. :)
On with the tutorial!!
You will need 2 fabrics...your main fabric and a background fabric.
From your Main fabric cut the following:
3 - 4.5" squares
1 - 7.25" square
1 - 2"x7" rectangle
From your background fabric cut the following:
2 - 4.5" squares
1 - 7.25" square
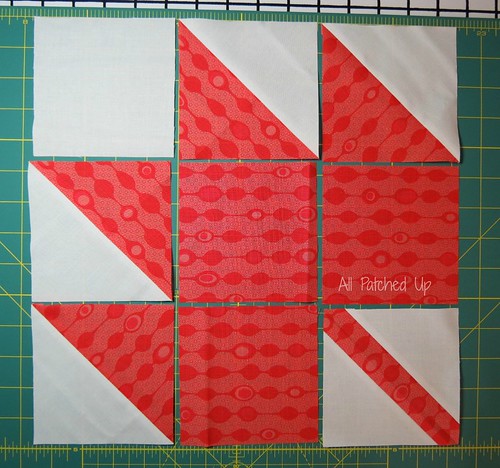
Here's what you should end up with.
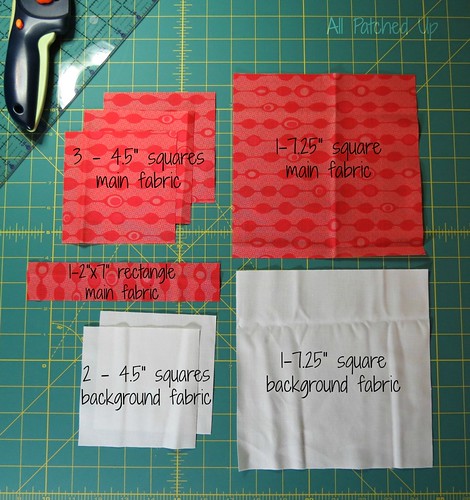 |
| All the pieces you need for this block. |
To create the HST (half square triangle) units:
Take both 7.25" squares and lay them down right sides together.

Sew around the outer edge 1/4" inch from the edge.You will essentially be sewing the two squares together on all edges.

Once they are sewn together, take them to your cutting mat and cut both diagonals. This will create 4 HST units.
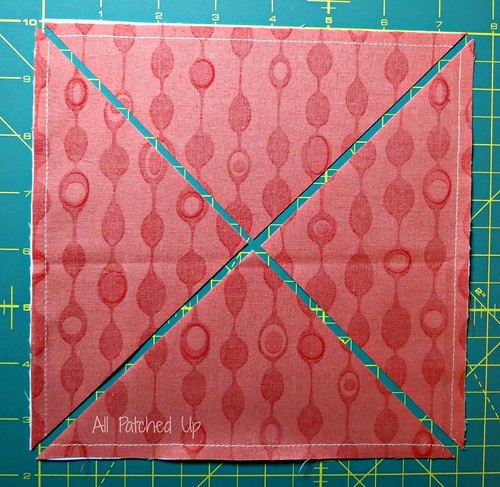
Press all 4 units and trim/square up to 4.5". Set aside.
 |
| Pressed but not yet trimmed. |
For anyone not familiar with this method of creating HST units, please see the tutorial HERE. Things will make much more sense after seeing the photos. :)
To create the stem unit:
Cut one of your background fabric 4.5" squares in half on the diagonal to create two triangle pieces.
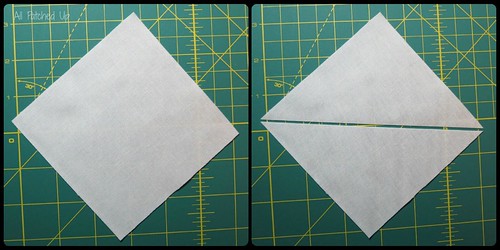
Fold the triangles in half on the side you just cut to find the center point. Either crease or mark the center point (or both if you're like me and go for overkill ;). Take the 2"x7" rectangle of main fabric and draw a line at 3.5" (across the short side) to create your centerpoint there as well...be sure this is straight!
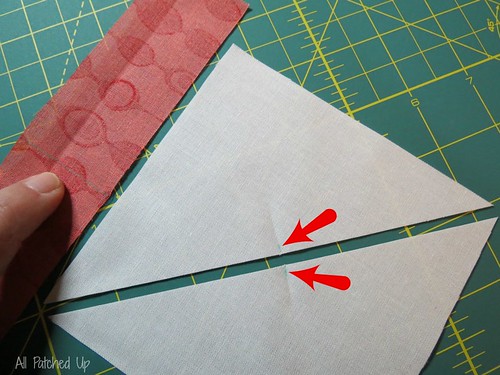 |
| Arrows and my finger point to where I've marked my center points. |
Line up the center mark on one triangle with the center line of the rectangle with right sides together. Sew together with 1/4" from edge.
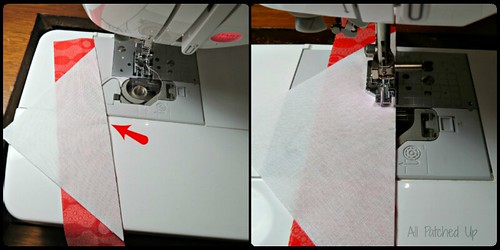 |
| Lined up my center marks before sewing. Use pins if it helps you!! |
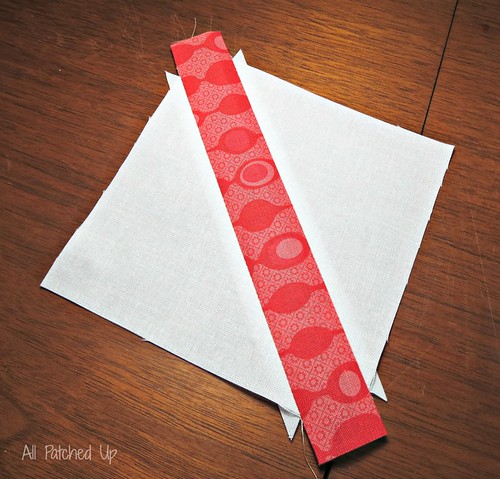
Repeat for other triangle/side of the rectangle and after a good press, you should end up with something that looks like this.
I like to then fold the unit in half on the diagonal and line everything up to find the center of the stem. Using my iron I crease the ends. This makes it easier to square up my stem unit. Trim to 4.5" square, then press again to remove the crease.
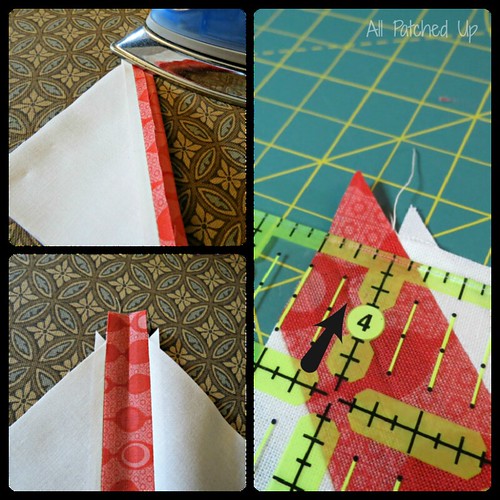 |
| Arrow in right photo shows how I use the crease I created to square up the block to 4.5" |
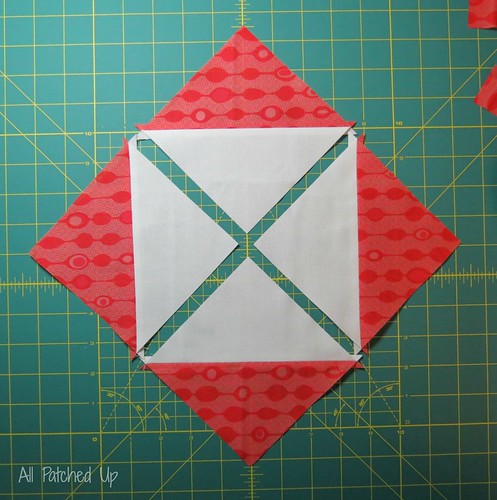
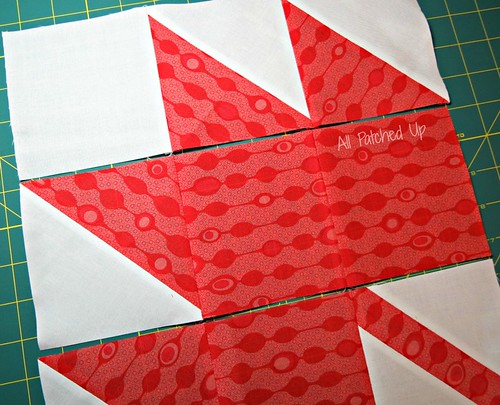
To finish the block:
Lay out all the pieces of the block as they're supposed to be. At this point all 9 'units' should measure exactly 4.5". It is very important that when sewing these together you use a scant 1/4". If you sew with a true 1/4" seam you will end up with a block that measures shy of 12.5" after pressing. If this isn't something you're familiar with, I'll gladly explain the why's and help you learn how to sew a scant seam. Just leave me a comment or send me an email. :)
Sew together the pieces of each row. Press.
Sew the rows together to finish your block. Press.
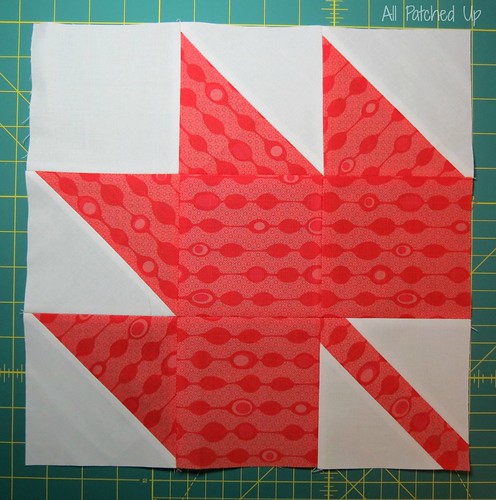 |
| All finished!! |
After everything is finished trim to 12.5" if necessary. If you've measured and trimmed everything correctly and used a scant 1/4" seam, the block shouldn't need any trimming. :)
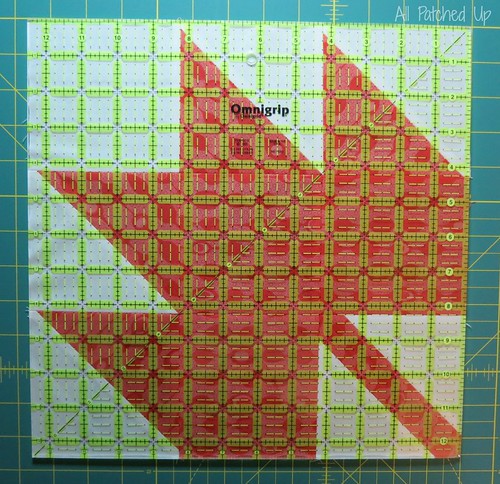 |
| Came out at exactly 12.5" :) |
I hope this helps those of you that have been having trouble. If you have any questions or notice anything inaccurate or wrong, please let me know so I can get it fixed.

This is really well written and the pictures are great!
ReplyDeleteThanks True! I always worry whether what I'm writing makes sense to anyone other than myself...so thanks for the confirmation it does! ;)
DeleteThat's great. I wish this had been done a couple of months ago when my guild did the Maple Leaf Block!
ReplyDeleteWell, I'd say better late than never, but I know that isn't very helpful in this situation. lol Thanks for looking tho and if you ever need to make the block again.....
DeleteThank you! This is much appreciated. :)
ReplyDeleteAnytime, glad I could help! Good luck with your block. :)
DeleteI really like how you did your 4 HSTs at once.
ReplyDeleteThanks, certainly speeds it up a bit! :)
DeleteIf you follow the link I included to the tutorial on the 4HSTs, she has a chart for what size square to start with to end up with the size HSTs you need. Very Handy!! (Tip: Add 1/4" to the large square when you cut if you like to trim your HSTs down to size.)
Love this system for HSTs. Tried to follow the link but would not connect. Guess it is an old link. Maybe you have more information about viewing other sizes. Thanks for this informative post.
DeleteExcellent tutorial with just the right amount of pictures. I knew you were good at organizing Bees but had no idea you excel at blogging! Definitely have bookmarked your blog!
ReplyDeleteAwh...thanks Terry! I'm doin my best! I wouldn't really consider it excelling where the blog is considered tho, it's been a slow start. LOL. But I'm working on it. :)
DeleteGreat tutorial! I am ridiculously excited to try the magical 4 hst at a time trick! Spweee!
ReplyDeleteLol. Glad you enjoyed it and good luck! Let me know how it works for you. :)
DeleteHey Angela, love your sewing space, really looks great, and love how you've organized your stash! May have to share how you did that!!
ReplyDeleteThanks Carol Marie! As lovely as it is tho, now that I got a new machine, I have to completely rearrange again. lol So, you'll likely be seeing another new update in the coming weeks. ;)
DeleteAs for my stash, it's just a matter of folding everything the same...I follow the folding method Jeni of In Color Order uses, which you can find at http://www.incolororder.com/2011/01/art-of-choosing-folding.html Took a while, but it's soooo much nicer when everything is the same shape and size...easier to sort and store and see! :)
Thank you for the tutorial very clear
ReplyDeletehttp://myeleganthome.blogspot.ae/
Thank you for the tutorial very clear
ReplyDeletehttp://myeleganthome.blogspot.ae/
Have been on the hunt for a really clear tutorial for this 12 in block....and yours is perfect! Expect a bit of traffic from Calgary Modern Quilt Guild!
ReplyDelete