One thing I'll say before I get started, she wants variety. Her color requests are green and purple with the white ....accent parts. Anyway, just because I've used purple in the middle and green around the edges doesn't mean you have to! My hope is some of you change it around and others do it this way. :)
Let's get started shall we?!
Supplies:
You'll need one purple and one green fabric (fabrics A and B) and white.
Cut the following:
From Fabric A:
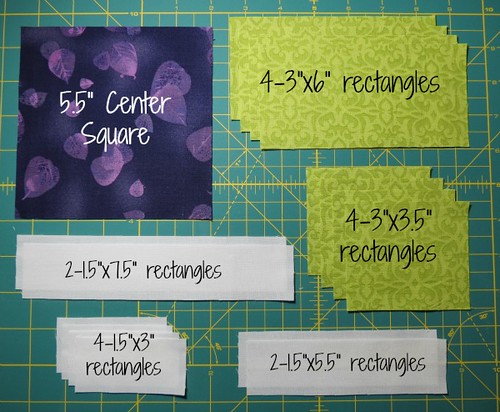
1 - 5.5" square
From Fabric B:
4 - 3" x 3.5" rectangles
4 - 3" x 6" rectangles
From the White:
2 - 1.5" x 5.5" rectangles
2 - 1.5" x 7.5" rectangles
4 - 1.5" x 3" rectangles
Tip: When working with a new block design, I find it easiest to lay out the block. This ensures I don't sew things together incorrectly. ;) This block is no exception. There are short rectangles and longer rectangles for both the white accents and the outer color border. Look at the following photo closely and lay out the rectangles as marked. (It won't ruin the block if the rectangles are swapped, but it looks nicer when it's consistent.)
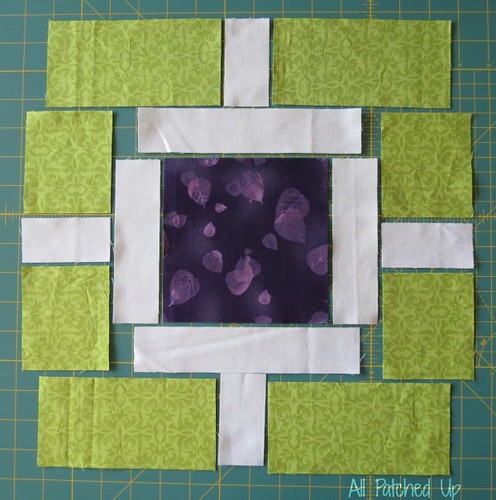 |
| Short borders and white accent strips on the sides, longer ones on the top and bottom. |
As always sew all seams with a scant 1/4". I press all seams open. If you press to one side, press the seams toward the darker fabric.
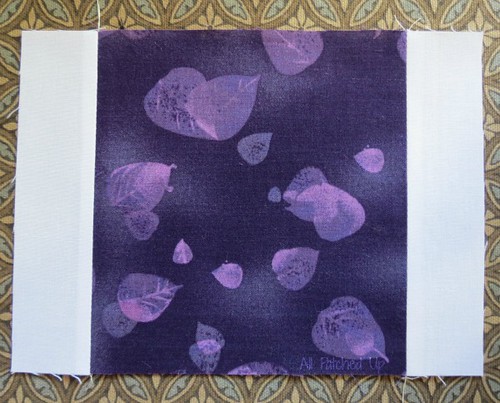
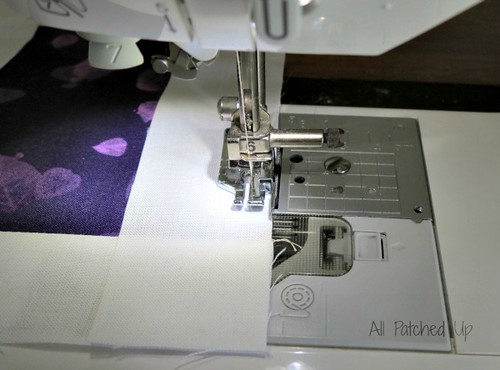
Sew the two 1.5 x 5.5 white rectangles to the right and left side of the center square. Set and press seams.
 |
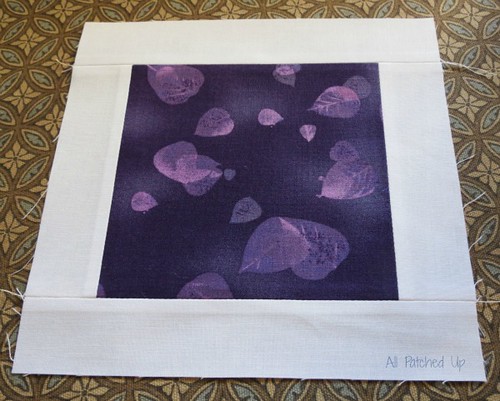
Then sew the two 1.5 x 7.5 white rectangles to the top and bottom of the center square.
Set and press your seams, then trim/square up block if necessary. It should measure 7.5" square at this point.
Sew each of the 4 - 1.5 x 3 white rectangles between the corresponding Fabric B outer borders, both sides and top/bottom. Set and press all seams.
Sew the shorter border pieces to the right and left of the center square. Set and press seams.
Sew the longer borders to the top and bottom of the center square. Set and press seams.
At this point, I always turn my block right side up and give it a good final pressing.
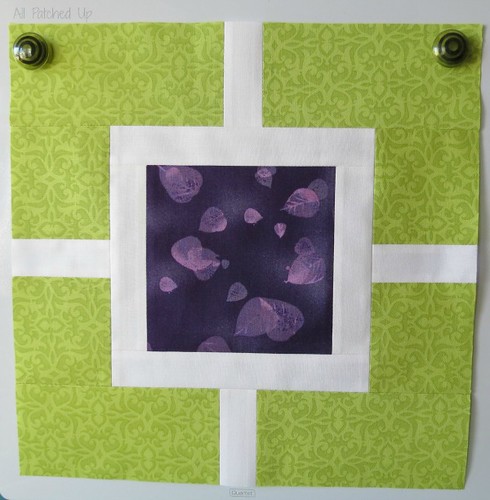 |
| Don't mind the magnets, they're just holding the block in place. |
Trim and square up to 12.5" if necessary. You're finished!
Great job!! Stand back and admire your block. :)

*Disclaimer: I did this tutorial to help my hivemates with their bee blocks, along with anyone else that may want to make these blocks. While the tutorial is my own work, the design is not. If this block is your original design, please email me so that I may either give you credit or remove the post, at your request.*


Good tutorial. Pretty too! I'll get working on one.
ReplyDeleteThank you! Have fun :)
DeleteSo pretty! Great block.
ReplyDeleteThank you!
DeleteLove, love, love and also love I now have this block resized for future use thank you Angela!!
ReplyDeleteYou betcha! Always glad to help. ;)
DeleteHey, I like this one also! Thanks for the tutorial Angela, I think I'll make it even though I'm the other hive :-)!
ReplyDeleteIt's a great block with a lot of possibilities! Real fun and goes together quickly.
DeleteAngela, this is an easy to follow tutorial. I love how you make things look so easy! Thanks!
ReplyDeleteRebecca smith
Thanks Rebecca...I do my best! :)
DeleteThanks - my granddaughter would like the 12 instead of 10 blocks. Very much appreciate your doing the math!
ReplyDeleteHappy to help! Good luck with your granddaughter's quilt. :)
DeleteNever set the Boresi Glass Pool Fencing post directly over or beside a survey marker as it could result in some disturbance or difficulty in accessing the marker. The cost of replacing a lost or damaged marker can often exceed the cost of the fence so be careful.
ReplyDeleteI made a wedding quilt for #4 son and DIL, using this pattern which she chose from a Pinterest pic.
ReplyDeleteI posted about it for the Blogger's Quilt Show here:
http://ros-the-quilter.blogspot.com/2015/10/bloggers-quilt-festival-2015.html
I am now in the process of making a new quilt for my own bed using the same idea.
where there is interest in the conservation of woodlands and in the ecological benefits of coppicing. Fencing Wholesalers
ReplyDeleteWe service customers in the areas of Bittern, Crib Point, Hastings, Frankston, Mornington, Dromana, Rosebud, Red Hill and the Mornington Peninsula. Installing Chain
ReplyDeletefence landscaping in 2015, it is instant garden fencing landscaping ideas for you to turn your garden or courtyard into a beautiful outdoor living area in short time, and no special maintainance is asked,chain link fence
ReplyDeletesupport climbing plants, and be features in their own right as decorative backdrops to planting. They can be as low as 50 or 60 centimetres, to enclose raised vegetable or formal beds, or above 1.8m high.
ReplyDeletebackyard fence
Having a swimming pool in the premises is something that offers exceptional look and feel too. You can just sit back and relax at the pool in your leisure time or can spend weekends with your friends and family there. It is a cool thing to have a pool at your home and it will give you some minty moments for sure. fencing for privacy
ReplyDelete