We have a King!! :D
Today we're doing a tutorial for the block chosen by the King of March, Mr. Man himself! Curt's chosen the double hourglass block for his month. He's looking for some good bold colors in these blocks and asking for you to choose fabrics that play nicely together (coordinate) yet have some good contrast. Prints or solids...both the same or mix em together, he's good with any of it. So, have fun with this one. :)
Because he wanted a 12" block (well, 12ish....we've had some troubles with the size....more on that at the end tho), and we weren't able to find a tute for that size, I just decided to write up a quick tutorial. It's not a tough block but you are working with bias edges and that does make things just a bit more complex. There's lots of pictures for this one, so lets get started! :)
For one block you'll need:
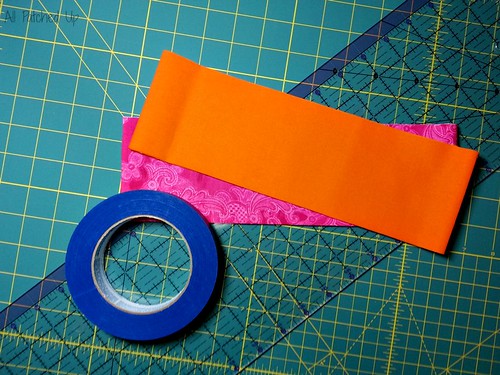
2 strips of coordinating fabrics, each strip should be 3.5" wide x WOF (width of the fabric) (if you are purchasing fabrics, 1/8th of a yard will be enough)
You'll also need your ruler and a rotary cutter for this one. I have some painter's tape in the photo as well because I'm gonna show you a little tip to make the cutting a bit easier. Won't make much difference for one block, but if you want to do a quilt of these blocks for yourself, it'll be a timesaver! :)
The fabrics for this block weren't playing nice with the camera. So, the colors may look off or just not right in some photos...did my best during editing, but some were rough. lol
First, cut your strips to 3.5" if they aren't already.
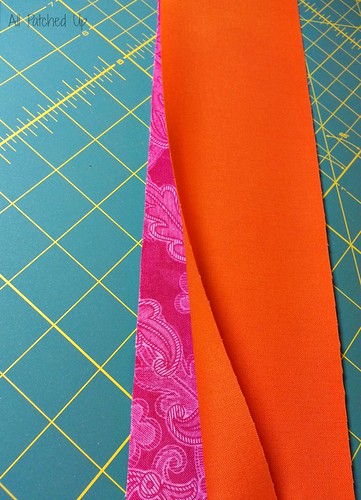
Unfold both strips and lay them right sides together. Pin one side (if you do that sort of thing....I don't, I just throw caution to the wind and go! heh)
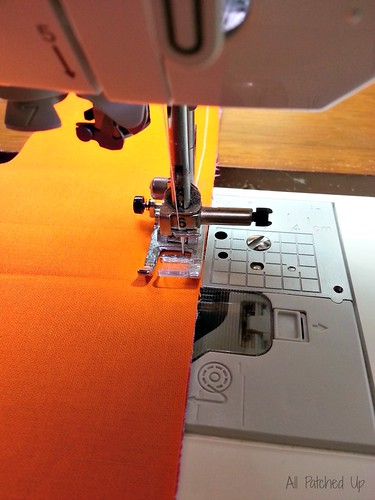
Sew the strips together along one side using a scant 1/4" seam. Set and press your seam. This one's a little long, so it may take a little while. ;)
Take the strip set to your cutting mat.
We're going to lay out the strip set and cut some out some triangles for the block using the 45° line on our rulers.
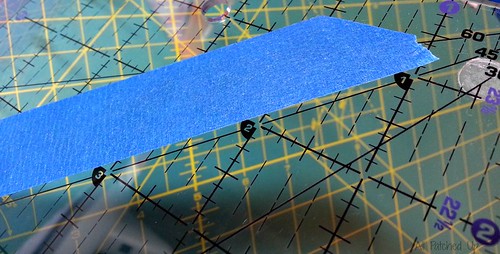
Remember when I said I had a tip for you? When making many of these blocks, it can be helpful to use a piece of painter's tape to mark off the 45° line so that it's quickly lined up. So...take a piece of tape and just stick it right to your ruler. I place it just above the line rather than directly on it...makes lining things up still possible. I use painter's tape, but any low tack tape will work, it won't leave a residue on your ruler when you're finished and remove it.
One other thing I want to mention here quick. When we cut these, we'll be cutting on the bias. That means both edges that we are cutting will be very stretchy and easy to distort. So, when picking them up or moving them around, sewing, etc. do your best to not stretch or pull on those edges. It will make a difference! So, now that you're all taped up (ha!) and I've given my little 'bias' warning...lets proceed!! :)
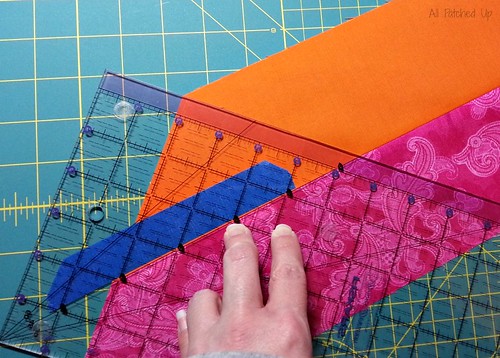
Line up the 45° line on your seam. You want the edge of the ruler to start just a bit past the selvedge of the fabric. (see photo for a better idea of what I'm talking about. The photo makes more sense!)
 |
| The ruler starts just at the edge of the fabric (about where you would normally trim the selvedges). |
When you have it all lined up properly, cut across both strips.
See...done!
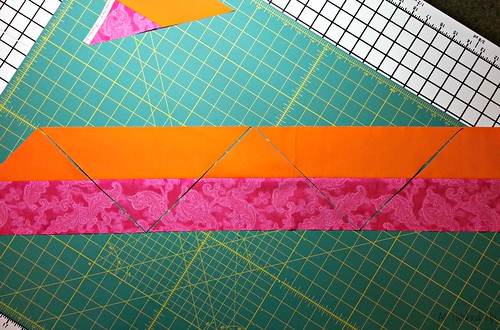
Ok, now you're going to flip your ruler over and line up again on the seam using the 45° line...so the ruler will be going the other direction.
But this time you want to make sure you line up the ruler with what will be the point of the triangle. This is pretty important as the more accurate you are here the better your block will be! Take your time lining this up and be careful that nothing shifts when you cut.
 |
| Line up accurately to create a perfect point for your triangle! |
You will continue this, flipping the ruler each time until you have cut out 4 triangles. Like so....
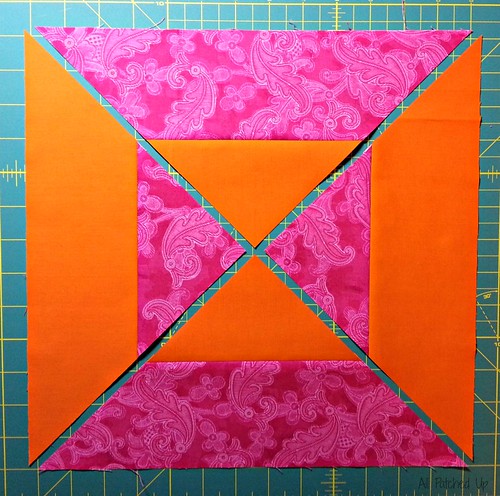
When you have cut all your triangles, carefully lay them out in the block pattern. You'll notice that two triangles have color #1 on the outside and color #2 on the inside and the other two have color #2 on the outside and color #1 on the inside. (did I lose ya'll there?! :D lol) Make sure you have 'matching' triangles on opposite sides of the square.
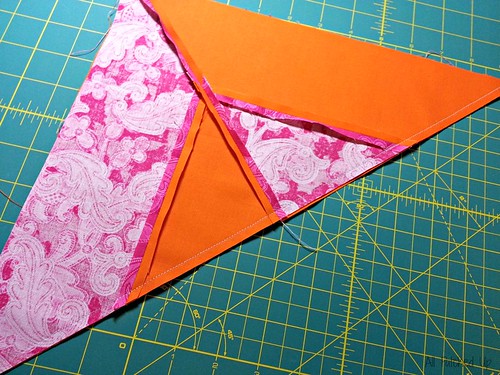
Looking at your layout, take the triangle that's on the bottom and fold it over on top of the triangle that's on the right. Match up your seams and pin.
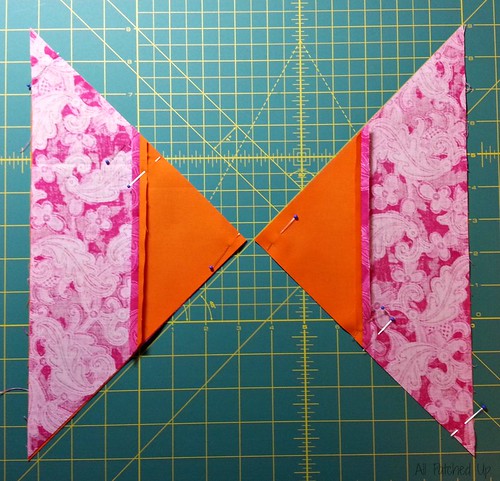
When you're finished with that take the top triangle and fold it down onto the left side triangle and again pin your seams. This is what you should have now....
Take the pieces to your machine and stitch those two seams....remember, don't pull or force the fabric while sewing! After you've sewn both, set your seams and press.
Now all that's left to do is to sew one set to the other. Again pinning helps here....keep your seams matched up. Take it back to your machine and sew that last seam.
When finished, set and press your seam. And that's it! You're finished! :)
You should end up with a block that measures about 12.5". We had varying results, some coming in smaller, which was truly weird. SO, don't be surprised if your block ends up a bit shy this time...it's perfectly ok. With a little tinkering, I'm sure I could figure out the issue, but for now, it is what it is. heh
For the bee members, please DO NOT trim the blocks. As many times as we've made this block, we tend to come out with blocks that vary in size a bit, so he'd like you to just send the block as is and he'll trim them all after they arrive. That way we can go thru and figure out which is the smallest, and trim the others to match.
So....how's your block look??





Thank you Angela! This tutorial is perfect and I love how the block turns out :-)!
ReplyDeleteYou're welcome and glad it turned out well! :)
DeleteGreat tutorial, Angela!!
ReplyDelete