Sunday, January 27, 2013

Stepping Stone Path block tutorial

So, two posts in one day! This time it's for Hive #3 of the Newbee Quilters. Cathie found this block and just loved it but we were unable to find a tutorial, so here we are again! One note...I wrote this tutorial ahead so it would be ready on time, so be sure to read her thread and use the colors she's selected, don't follow my lead! ;)

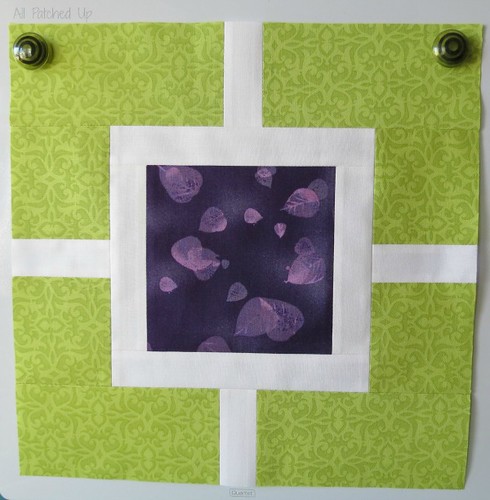
Update: Just wanted to post Cathie's chosen colors. She's asking for a scrappy block with strips in pinks, purples, yellows, aqua, blues, and greens. For the solid squares, she'd like you to use pink. She prefers a bright pink if possible.

I'm not real sure of the original name of this block, or if there is one. I've seen under a couple of names, once called a mock log cabin, but upon a search for that block name, I get a mess ( a whole bunch of blocks in different variations, most of them not like this one). heh So....I'm calling this block Stepping Stone Path. (Credit for the name goes to my wonderful friend True...she doesn't have a blog that I'm aware of, but you can find her over on Threadbias. :)

This block is fairly easy to construct. Seriously!! It went together so quickly and easily that I often forgot to stop and snap a photo of each of the steps I needed for this tutorial. So, I'll apologize now for the lack of photos in this one.

Keeping all your strips straight and in order will be the most important part. I actually had more difficulty writing out the directions for all of you than I did making the block...have to make sure it all makes sense for you guys! lol Because of that, I'm going to tell you before we begin to be sure to look to the photos if something doesn't make sense. They will still help a great deal...altho the grey gloomy weather we've been having isn't helping me take nice clear shots....the ones I remembered to snap that is!

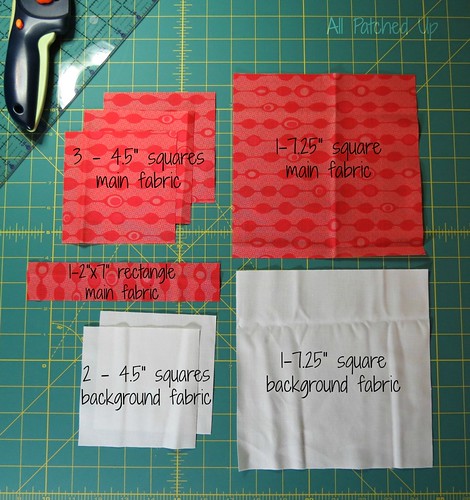
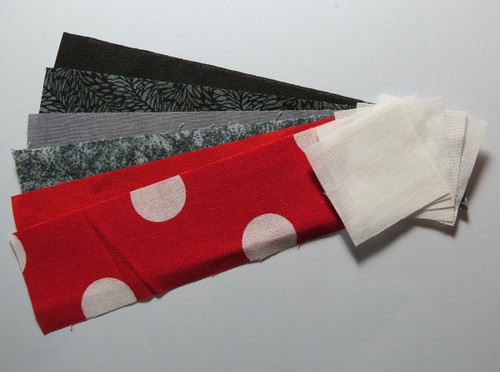
So, for this block you will need:
      6 - 2.5" white squares (pink squares if you're making this for the bee)
      6 - 2.5" x 11" strips in your chosen fabrics/colors

Supplies ssp


Cutting:
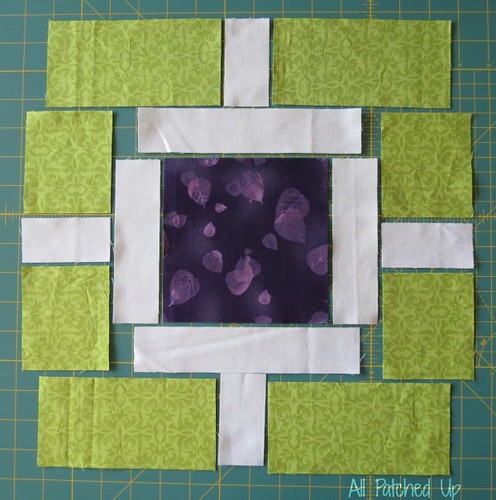
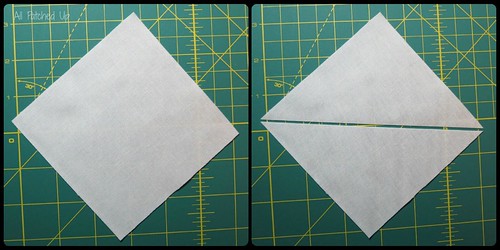
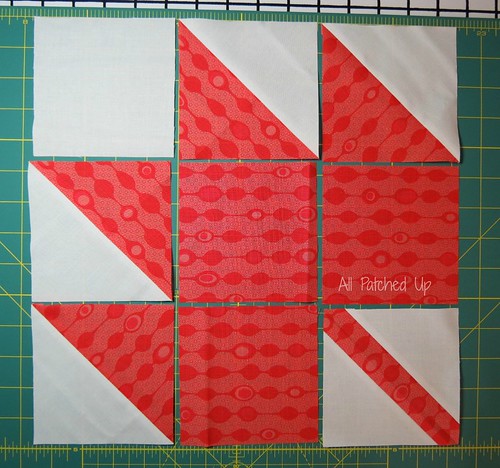
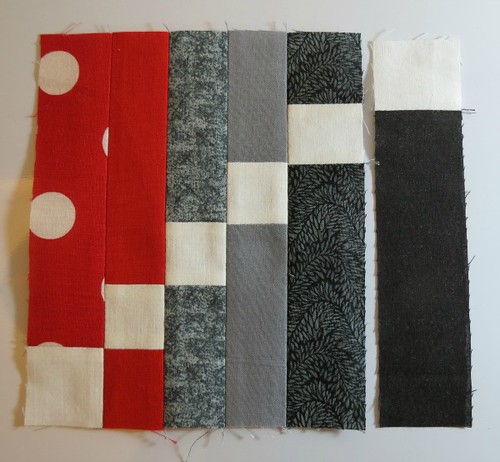
The easiest way to keep this all straight is to lay out the strips in the order you'd like them to end up in your final block. I will refer to the strips you need to work with by row. See the following diagram and keep in mind the way I've labeled them....row 1 at the far left counting over to row 6 at the far right.

cutting and row #s


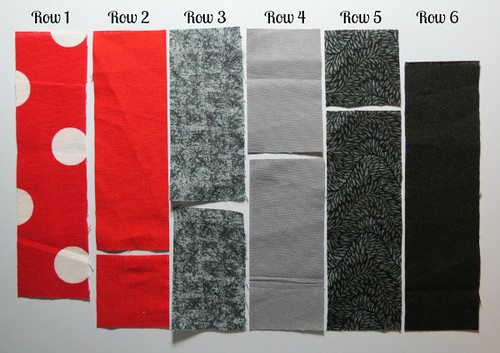
Take the Row 1 and Row 6 strips and cut them down to 10.5"
Take the Row 2 and Row 5 strips and cut a 2.5" square off the end of each. This should leave you with a 2.5" square and an 8.5" strip.
Take the Row 3 and Row 4 strips and cut a 4.5" strip off the end of each. This should leave a 6.5" strip of each as well.
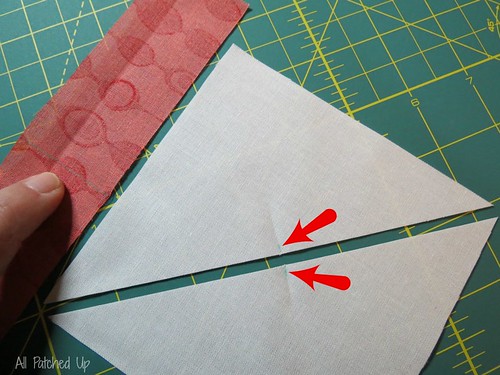
(Refer to the photo above if the above cutting instructions do not make sense or are difficult to understand. Basically, you'll be cutting the strips where you will sew the white squares.)

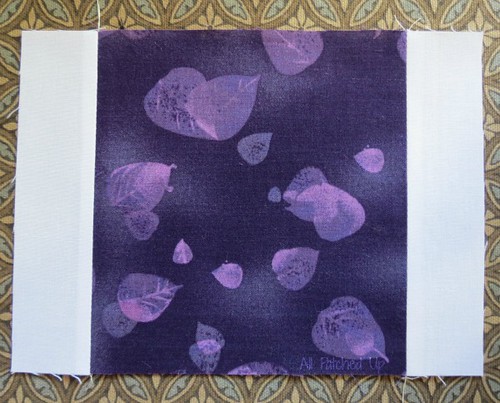
After you've cut all your strips, lay out your block. This will help ensure you sew all the strip pieces to the correct squares. Use a scant 1/4" seam throughout.

This is one place I forgot to take a photo...of the block laid out properly, sorry! But, between the photo above and the final one of the completed block at the end of this tute, you should be able to figure out the layout easily. You want to take your strips and separate them where they've been cut and lay your white squares in between. And then of course 1 white square at the bottom of row 1 and top of row 6.

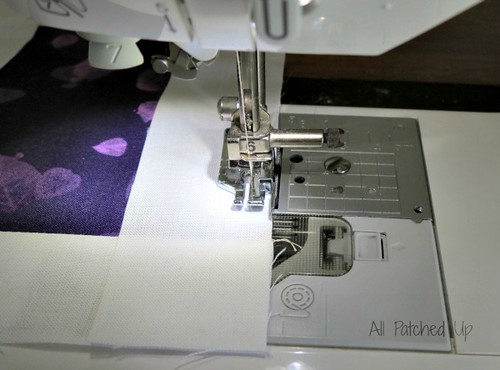
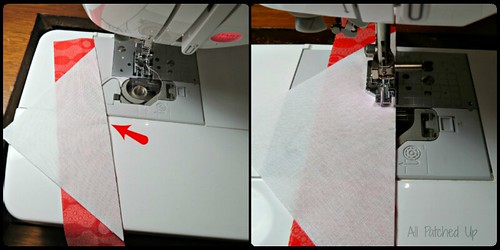
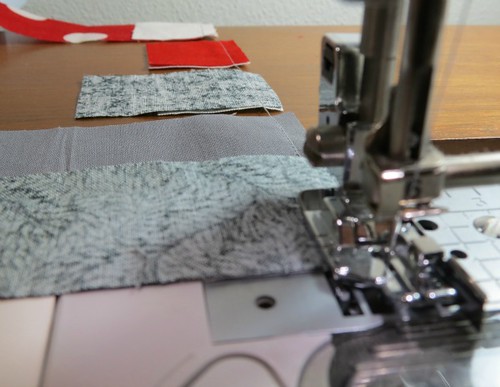
As I mentioned, I used a chain piecing method to sew these blocks. Chain piecing always speeds things up. and anything that speeds up the process is a good thing in my book!!

chain piecing


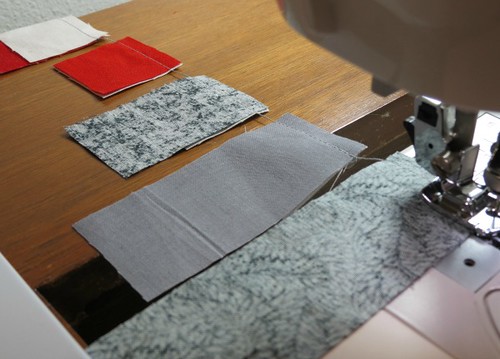
I also forgot to take a photo of the next step. Well, I took pics of my doing the chain piecing, like the one above, so you could see that, but forgot to snap the photo of the square sewn to just one part of the row. Hopefully you can still follow along.

You will begin by sewing the top piece of each strip to the square. Let the chain piecing begin! I start by sewing the Row 1 strip to it's square, but I don't cut my threads. Instead I sew a bit of blank space (no fabric) and then I'll take the top part of Row 2's strip and sew it to that row's square. Again without cutting the thread, I do the same for Rows 3, 4, 5 and 6. After finishing the row 6 strip you can go ahead and cut your threads. Then snip the threads between each of the strips to separate them before setting and pressing your seams. Lay the square/strip units back where they belong.

chain piecing 2
You can see the blank space I leave between the strips while chain piecing.


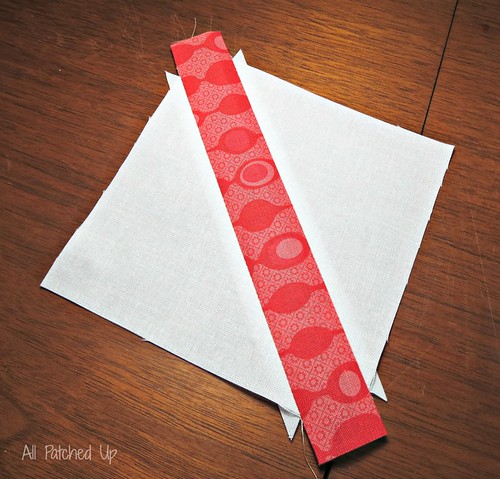
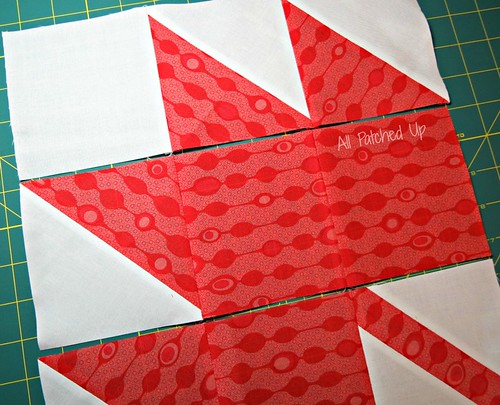
You will now sew the bottom pieces of the strips to the coordinating squares just as you did the tops. Remember to set and press your seams. You will only have 4 strips to sew this time however as rows 1 and 6 only have one piece.

All 6 rows should now be sewn together.

6 rows


You just need to finish by sewing the strips together.

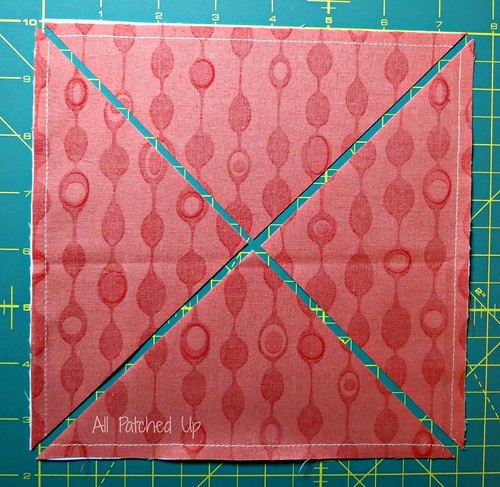
Now, before we continue, there is one thing I'll mention. I don't often use pins. They hate me...I swear!!! However, when I need to line up seams I do bite the bullet and use them. The squares in this block and the way they line up on the diagonal is an important part of the overall effect the block gives so it's important they line up properly. I use pins to ensure the seams are lined up with the previous row.
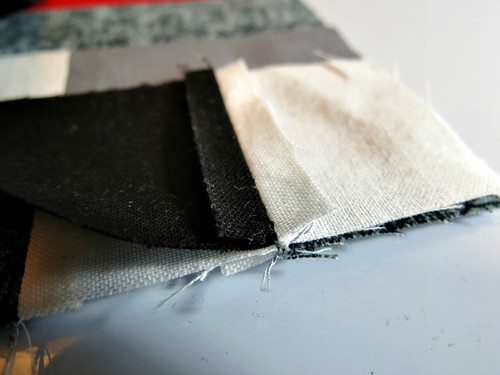
Line up seams
Lining up my seams.


Start by sewing Row 1's strip to Row 2....lining up the seams. Set and press your seams. Continue sewing the remaining rows...3 then 4 and so on til you've sewn them all together.

last row
5 of the 6 rows sewn together.

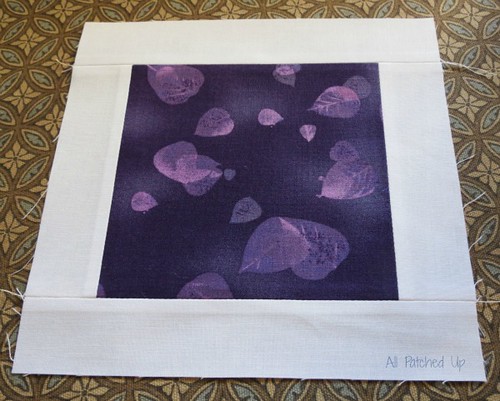
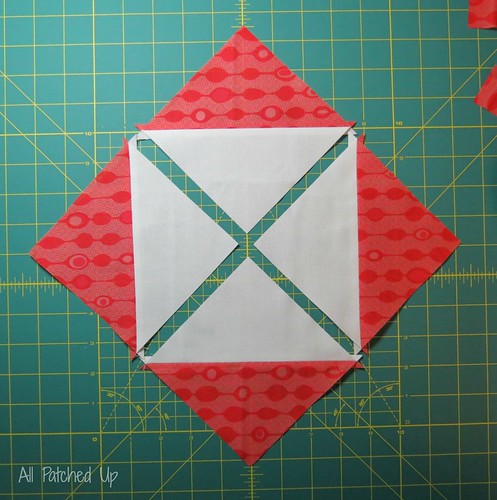
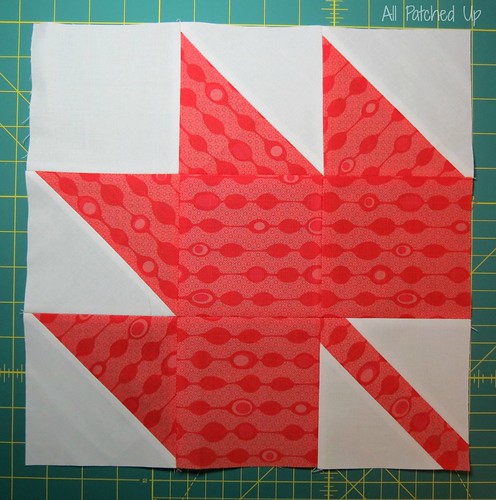
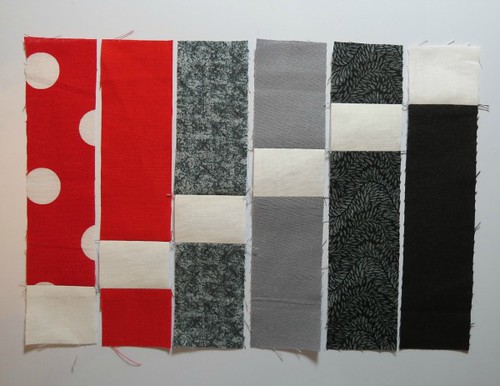
When all your strips have been sewn together, here's what you should end up with.
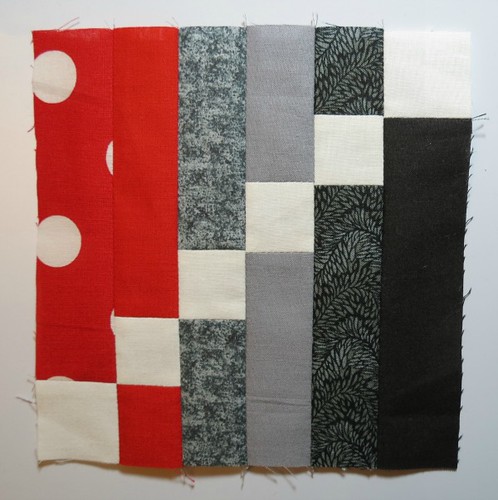
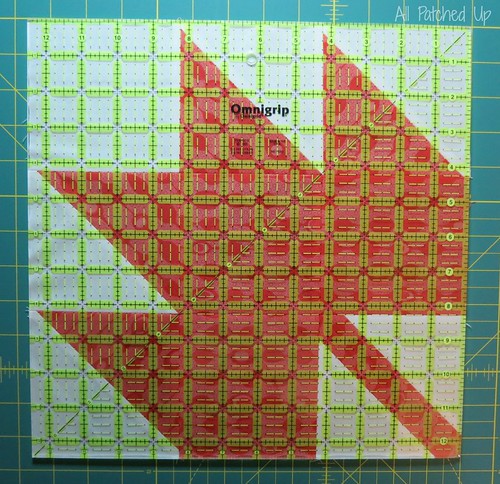
completed
Completed block!


All that's left to do is make sure it's all square and trimmed up and you're finished!

Now, that wasn't so bad was it?

I hope you all enjoy making this block, I know I did. It was quick, painless and done before I knew it. I may just make a few more of these. Just what I need!! *snicker*


*Disclaimer: I did this tutorial to help my hivemates with their bee blocks, along with anyone else that may want to make these blocks. While the tutorial is my own work, the design is not. If this block is your original design, please email me so that I can either give you credit or remove the post, at your request.*

Friday, January 25, 2013

Garden Fence Block Tutorial

The original tutorial for this block, which can be found at Hyacinth Quilt Designs, was chosen as the February block for Hive #1 of Newbee Quilters. The original creates a 10" finished block.  Since my mother's the queen this month (don't let it go to your head woman, it's just for the month!!  ;) when she stated she wanted a 12" block, I did what any good daughter would *snicker* and told her I'd figure out the sizes and write up a tutorial for her to use.

One thing I'll say before I get started, she wants variety. Her color requests are green and purple with the white ....accent parts. Anyway, just because I've used purple in the middle and green around the edges doesn't mean you have to! My hope is some of you change it around and others do it this way. :)

Let's get started shall we?!

Supplies:
You'll need one purple and one green fabric (fabrics A and B) and white.

Cut the following:
      From Fabric A:
           1 - 5.5" square

      From Fabric B:
           4 - 3" x 3.5" rectangles
           4 - 3" x 6" rectangles

      From the White:
           2 - 1.5" x 5.5" rectangles
           2 - 1.5" x 7.5" rectangles
           4 - 1.5" x 3" rectangles

cutting gf


Tip: When working with a new block design, I find it easiest to lay out the block. This ensures I don't sew things together incorrectly. ;) This block is no exception. There are short rectangles and longer rectangles for both the white accents and the outer color border. Look at the following photo closely and lay out the rectangles as marked. (It won't ruin the block if the rectangles are swapped, but it looks nicer when it's consistent.)

layout gf
Short borders and white accent strips on the sides, longer ones on the top and bottom.

As always sew all seams with a scant 1/4". I press all seams open. If you press to one side, press the seams toward the darker fabric.

Sew the two 1.5 x 5.5 white rectangles to the right and left side of the center square. Set and press seams.

sides


Then sew the two 1.5 x 7.5 white rectangles to the top and bottom of the center square.

sew strips


Set and press your seams, then trim/square up block if necessary. It should measure 7.5" square at this point.

center


Sew each of the 4 - 1.5 x 3 white rectangles between the corresponding Fabric B outer borders, both sides and top/bottom. Set and press all seams.

sew together your strips


Sew the shorter border pieces to the right and left of the center square. Set and press seams.
Sew the longer borders to the top and bottom of the center square. Set and press seams.

At this point, I always turn my block right side up and give it a good final pressing.

finished
Don't mind the magnets, they're just holding the block in place. 


Trim and square up to 12.5" if necessary. You're finished!

Great job!! Stand back and admire your block. :)


*Disclaimer: I did this tutorial to help my hivemates with their bee blocks, along with anyone else that may want to make these blocks. While the tutorial is my own work, the design is not. If this block is your original design, please email me so that I may either give you credit or remove the post, at your request.*

Friday, January 11, 2013

Maple Leaf Block Tutorial

So. I've been away a while. Most of you that read my little blog already know the reasons for my absence. Those that don't...well, we'll just leave it at this. Life gets in the way sometimes. Between some health issues in my family and the holidays and some other issues, I was needed elsewhere. That's done and life is returning to normal so ...here I am. :)

Now, onto my post.

The members of Hive #2 of Newbee Quilters were asked to make a Maple Leaf block for January. Most tutorials for this pattern are for a 6" block. The few 12" block tutorials I found were either fiddly with too little (or none at all) wiggle room or weren't very detailed....both things most new quilters need. So...I decided to take photos while making a test block myself and post a tute for anyone that still needs it. The photos are poor as it was very late and lighting is horrible in this house. But they should be enough to help!

I do make this block slightly different than most other tutorials I've seen. I'm a bit...neurotic... about some things when I sew, which is the reason I do it differently. lol I like to make as many HST's at once as possible, and I prefer to make my HST's a bit large so that I can square up/trim them to the exact size after sewing...I include this little leeway and trimming space in my measurements below. Always sew with a scant 1/4" seam. There is as I said a little wiggle room here for some pieces, but accurate seam allowances are very important! SO.....practice. :)

On with the tutorial!!

You will need 2 fabrics...your main fabric and a background fabric.

From your Main fabric cut the following:
      3 - 4.5" squares
      1 - 7.25" square
      1 - 2"x7" rectangle

From your background fabric cut the following:
      2 - 4.5" squares
      1 - 7.25" square
   
Here's what you should end up with.

cuts
All the pieces you need for this block.


To create the HST (half square triangle) units:
      Take both 7.25" squares and lay them down right sides together.

sew edges


Sew around the outer edge 1/4" inch from the edge.You will essentially be sewing the two squares together on all edges.

sewn for 4HSTs


Once they are sewn together, take them to your cutting mat and cut both diagonals. This will create 4 HST units.

cut on both diagonals


Press all 4 units and trim/square up to 4.5". Set aside.

press - 4HSTs
Pressed but not yet trimmed.

For anyone not familiar with this method of creating HST units, please see the tutorial HERE. Things will make much more sense after seeing the photos. :)

To create the stem unit:
      Cut one of your background fabric 4.5" squares in half on the diagonal to create two triangle pieces.

Cut bgfabric on diagonal


Fold the triangles in half on the side you just cut to find the center point. Either crease or mark the center point (or both if you're like me and go for overkill ;). Take the 2"x7" rectangle of main fabric and draw a line at 3.5" (across the short side) to create your centerpoint there as well...be sure this is straight!

Mark all the centerpoints
Arrows and my finger point to where I've marked my center points.

Line up the center mark on one triangle with the center line of the rectangle with right sides together. Sew together with 1/4" from edge.

lining up stem unit
Lined up my center marks before sewing. Use pins if it helps you!!

Repeat for other triangle/side of the rectangle and after a good press, you should end up with something that looks like this.

stem unit


I like to then fold the unit in half on the diagonal and line everything up to find the center of the stem. Using my iron I crease the ends. This makes it easier to square up my stem unit. Trim to 4.5" square, then press again to remove the crease.

Press crease
Arrow in right photo shows how I use the crease I created to square up the block to 4.5"

To finish the block:
      Lay out all the pieces of the block as they're supposed to be. At this point all 9 'units' should measure exactly 4.5". It is very important that when sewing these together you use a scant 1/4". If you sew with a true 1/4" seam you will end up with a block that measures shy of 12.5" after pressing. If this isn't something you're familiar with, I'll gladly explain the why's and help you learn how to sew a scant seam. Just leave me a comment or send me an email. :)

layout


Sew together the pieces of each row. Press.

rows


Sew the rows together to finish your block. Press.

Done!
All finished!!


After everything is finished trim to 12.5" if necessary. If you've measured and trimmed everything correctly and used a scant 1/4" seam, the block shouldn't need any trimming. :)

perfect!
Came out at exactly 12.5" :)


I hope this helps those of you that have been having trouble. If you have any questions or notice anything inaccurate or wrong, please let me know so I can get it fixed.